 When you’re hiking, it’s not uncommon to have to cross water at some point. Typically, this is a creek, stream or river.
While many water crossings are safe and easy, others are not. In fact, it’s not uncommon for hikers to perish in water crossings. And even “easy” water crossings have the potential for danger if you trip or slip.
Preparing to Cross Water
Before you set foot on any trail, do your research. If you want to hike in spring, and on a trail where mountain snowmelt can turn gentle streams into raging beasts, wait until after peak runoff season. If there’s been a storm within the last 24 hours, reconsider your plans.
Even if you plan to start at a supposedly safe time, always check trail websites for information on current conditions. Many will note if a water crossing may be difficult or is inadvisable. It doesn’t hurt to double-check by calling rangers or local trail stewards, either.
If you know you’ll face a water crossing on a given day, waterproof your gear by having your clothes and sleeping bag in waterproof bags, along with other important-to-keep-dry items such as phones and matches. Don’t have a lot of items dangling off your pack, as they can catch on things if you slip and take you down.
Make sure family or friends know where you’ll be hiking, and when you’ll be facing the water crossing, mainly if there is any doubt as to its safety. Have a GPS device on you (I have a Garmin inReach Mini), and tell your loved ones you will let them know once you are safely across the water. They should also know that if you do NOT contact them on the day of your water crossing, and they can’t contact you, they should call authorities.
Ready to Cross Water
So now you’re on the trail and reach a water crossing. Before you plunge right in, consider three factors: the water’s depth, speed and obstacles.
Depth: In general, don’t cross water that is deeper than your knees, unless it is very slow-moving.
Speed: Fast-moving water is dangerous. Toss a stick in and see how fast it gets carried away. If you can’t walk alongside the stick, the water is moving too fast to safely cross.
Obstacles: Don’t cross upstream of hazards such as downed trees, waterfalls, boulders or riverbends with currents. Should you fall and get swept downstream, these items can be lethal. Check the banks, too. If they’re super steep or full of thick scrub, you might not be able to pull yourself out of the water should you get swept away.
Scouting Another Spot
If a river crossing is too perilous, you can always backtrack. That’s certainly safer than risking your life. Your other option is to scout out a 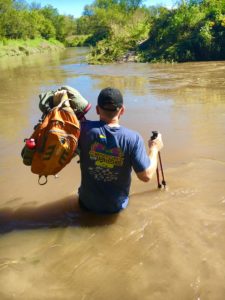 new spot. The trail is not always the best spot to cross.
So, try walking up and down the banks a short distance to find a better crossing. Look for wider spots in a stream or river, because those are generally slower and shallower than narrow ones. If you find a safe-looking spot, make sure you can get out on the other side.
Sometimes you may have to walk quite a distance, or bushwhack, to find a safer spot. But that’s always preferable than risking a perilous crossing. And if you look long enough, you’re almost guaranteed to find a safer crossing.
My husband, pictured at right, turned back because the water here was running too quickly.
Ready to Cross
If a crossing seems reasonably safe and doable, change into shorts or your undies. Long pants will be a drag in the water, plus you’ll want to keep them dry.
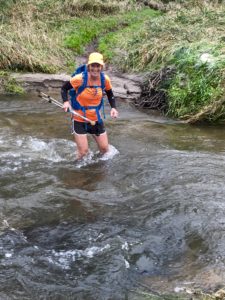
Put on water shoes. Crossing water with bare feet is dangerous. Rocks can be extremely slippery, plus any number of items in a riverbed can cut or injure bare feet. If you don’t have water shoes, take off your socks and remove any shoe inserts, then hike across in your boots/shoes.
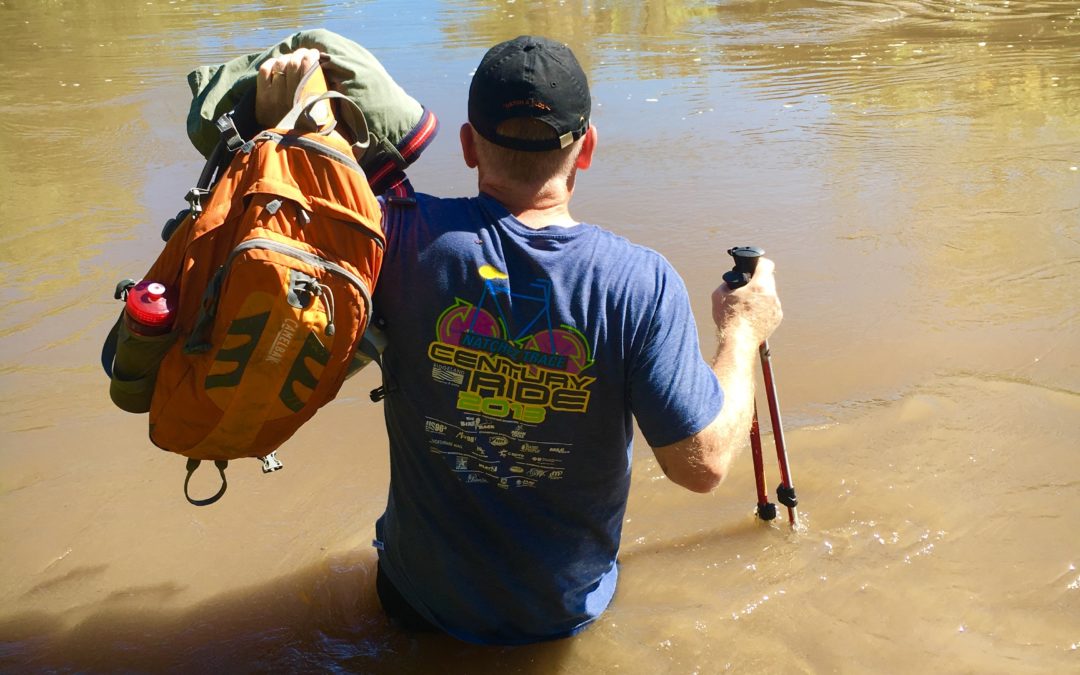
Put your pack back on, but don’t fasten any clips. If you fall, you don’t want your pack to drag you down. You need to be able to slip out of it and let it go, as tragic as that would be.
Grab your trekking poles or a walking stick. You always want to keep at least three points of contact in the water: your two feet, and at least one pole or stick. In the first photo at the top, I should have had one of my poles in the water.
How to Cross Solo vs. in Groups
If you’re alone, cross by facing upstream and shuffle-walking in a diagonal path downstream. Lean slightly into the current.
Cross in a group if the current is swift and/or strong, or if the water is deep. Duos should walk side by side, arms around each other’s waists or with arms linked. Cross sideways, facing opposite directions, with the stronger hiker’s back to the current.
Trios should put their hands on each other’s shoulders or link arms, and cross in a triangular formation.
Groups of four or more should form a conga line. The strongest hiker should take the lead, with the second-strongest in the back.
Using a Downed Log to Cross
Some hikers like to cross water by walking across a downed log. This can be great, or it can be quite dangerous. If you’re considering this, check out the log first. Does it have little branches that could trip you up or snag your pack? Are there rotted spots that might break through when you step on them? Does the log feel secure or wobbly?
If you’re not good with balance, it may be wiser to sit on the log and scooch across. I did this successfully on the Border Route Trail.
In this video clip, you’ll see me attempting to cross a fast-running stream in Colorado with the help of a downed tree. My husband walked across the water easily, holding onto the log to steady himself. I tried to do the same, but got halfway across and couldn’t proceed. The force of the water was too strong.
Luckily, my husband reached out a hand and helped me over. I shudder to think what would have happened if I had been alone, with a heavy pack on my back. I’m laughing about the situation in the clip, but it isn’t funny at all.
Swimming Across
Sometimes the water in a crossing is so deep, you’d need to swim across. Don’t. Swimming is a terrible idea unless there is virtually no current in the water and you’re a very strong swimmer.
If this is the case, however, remove your pack and blow up your inflatable sleeping pad. Put your pack on the pad, and push it in front of you while you swim. If you don’t have an inflatable pad with you, you can swim on top your pack, as shown in this video.
What to Do If You Fall
If you fall into the water and can’t get back up, take off your backpack STAT. Then get on your back, point your feet downstream and paddle for shore. Use your feet to push you away from any dangerous objects, and protect your head if you can.
Once safely on shore, evaluate yourself for hypothermia. And if you lost your backpack and GPS device, and cannot reach safety, hopefully your loved ones will soon contact rescue personnel.


